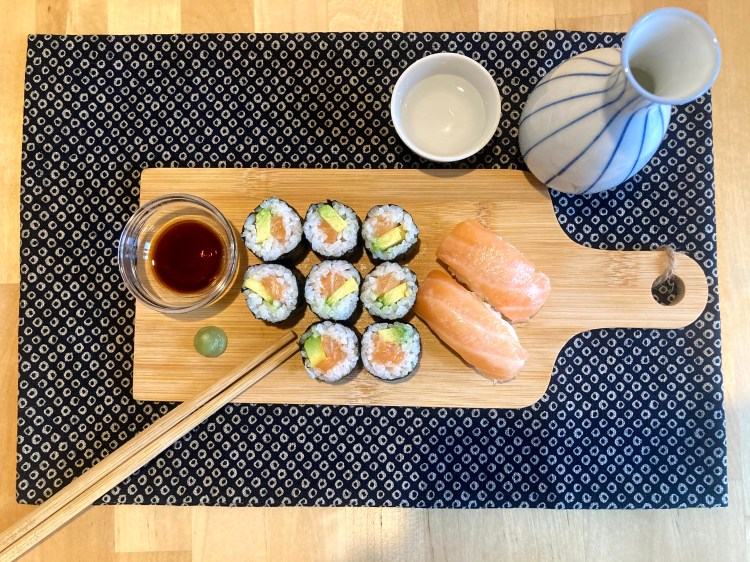
I will show you here how to make salmon avocado rolls, but feel free to substitute the ingredients. For example, you can replace salmon with tuna and make tuna avocado rolls, which are equally delicious. And of course, if you are vegetarian or don’t dare eat raw fish, just skip the fish and make avocado rolls which are also my favorite!
Cooking time: 20 mins + Sushi Rice prep time
INGREDIENTS (2 Servings)

- Salmon: 100g
- Avocado: ½
- Seaweed: 1 ½ sheet
- Sushi rice: 300g (see “How to Prepare Sushi Rice“)
This recipe yields about 2 to 3 rolls (=2 servings), depending on how thinly you can spread the rice on the seaweed!
BEFORE YOU START

Q. What type of salmon should I buy?
Make sure that the salmon you buy is “sushi (or sashimi) grade” and has no bones. Depending on where you live, there may be regulations that raw fish must be frozen before eating for a certain period at a certain temperature to kill parasites called anisakis, usually 48 hours in a home freezer (although I read that farmed salmons rarely have anisakis, and most salmons on the market are farmed).
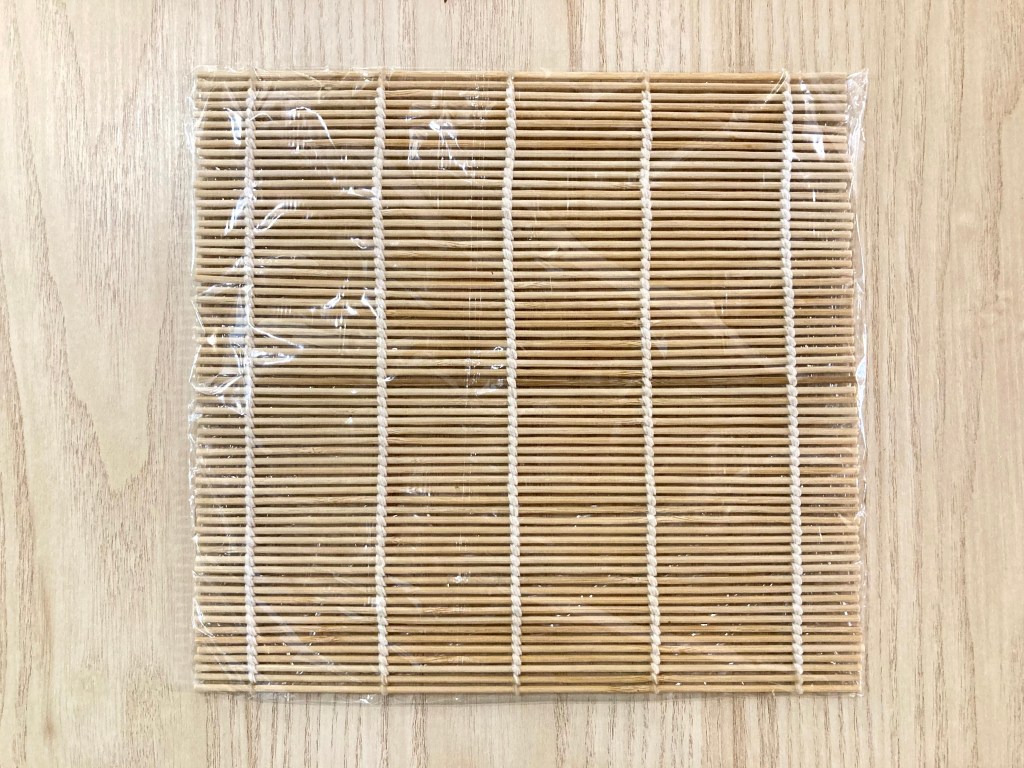
Q. Do I need to a rolling mat?
If you don’t have a rolling mat, you can use plastic wrap or parchment paper although it will be more difficult and you may need to practice a bit. Unlike uramakis (e.g., California rolls), it is not absolutely necessary to wrap the mat to make regular rolls. But if you are not confident about your sushi rolling skills yet, it may be a good idea to wrap it to save you some time later when it comes to cleaning!
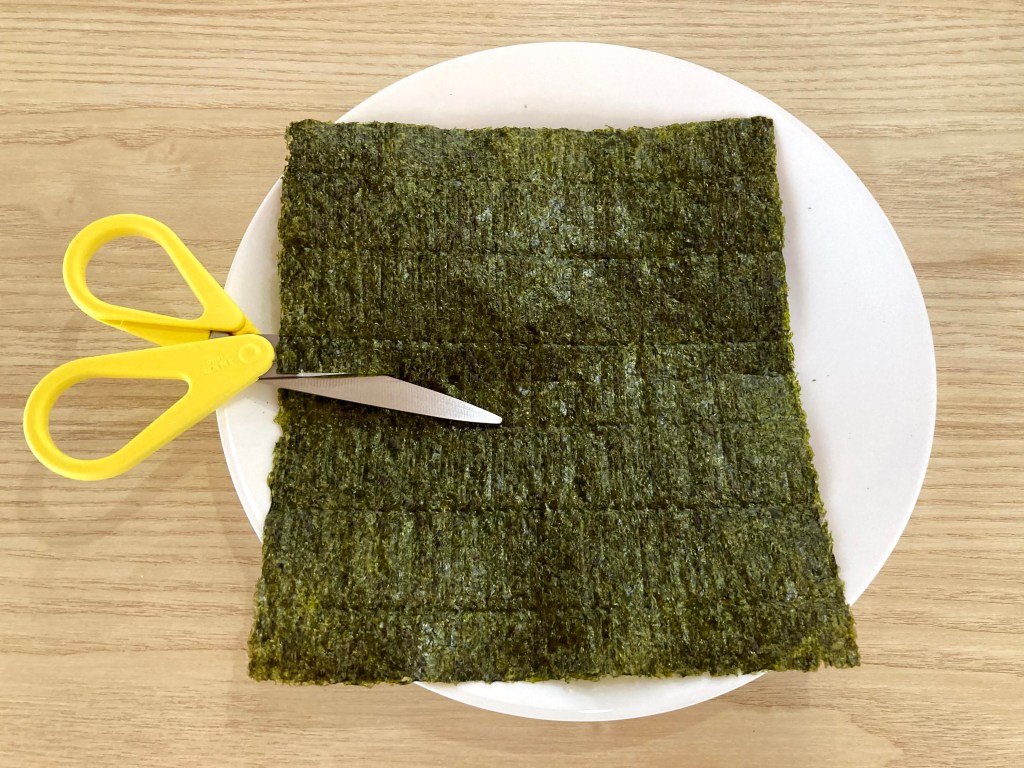
Q. How do I cut the seaweed?
The standard size seaweed is 21cm x 19cm, not completely square, and the lines on the surface run parallel to the shorter side. For half-size rolls, it seems customary to cut the longer side in half so that the roll will be thicker and can hold more stuff in.
NOW, LET’S START!
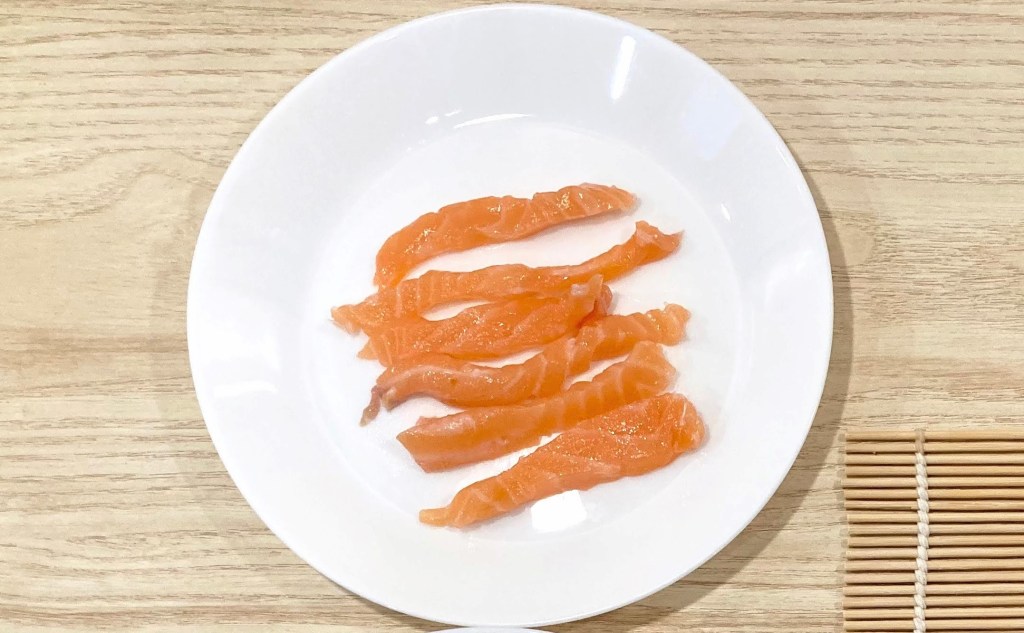
1. Make salmon strips. Remove the skin and slice the salmon1 into strips (approx. 1cm x 1cm, and any length, the longer the better).

2. Cut avocado. Cut the avocado2 into slices.

3. Place the seaweed on the mat. Place the seaweed3 at the bottom of the mat, with the rough (non-shiny) side facing up.
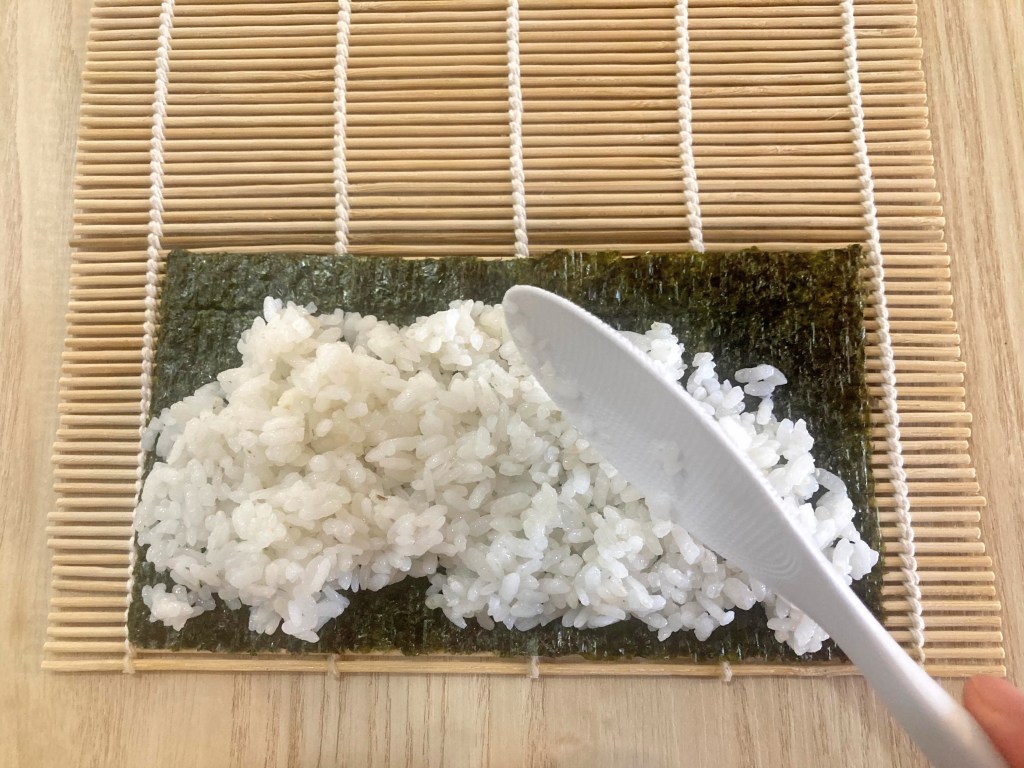
4. Put the rice on the seaweed. Then place about ⅓ of the rice4 on top of the seaweed little by little. You can always add later in the next step.
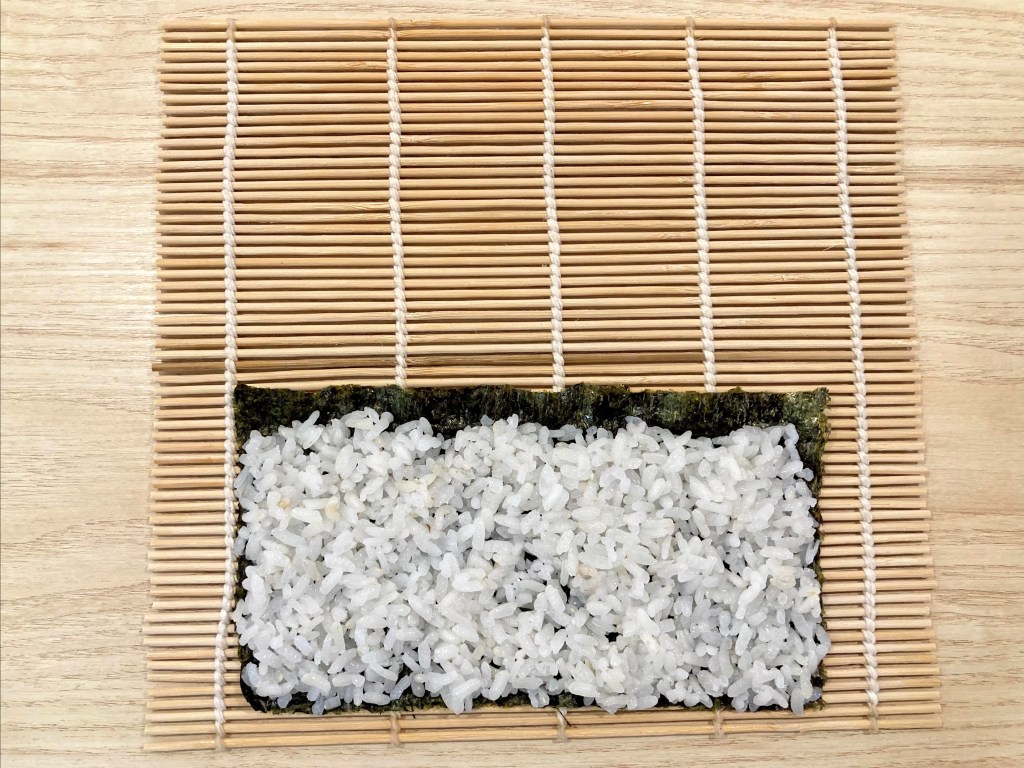
5. Spread the rice. Spread the rice on the seaweed as thinly as possible, with your wet fingers. (I find it easier to use my rice paddle to do this process.)
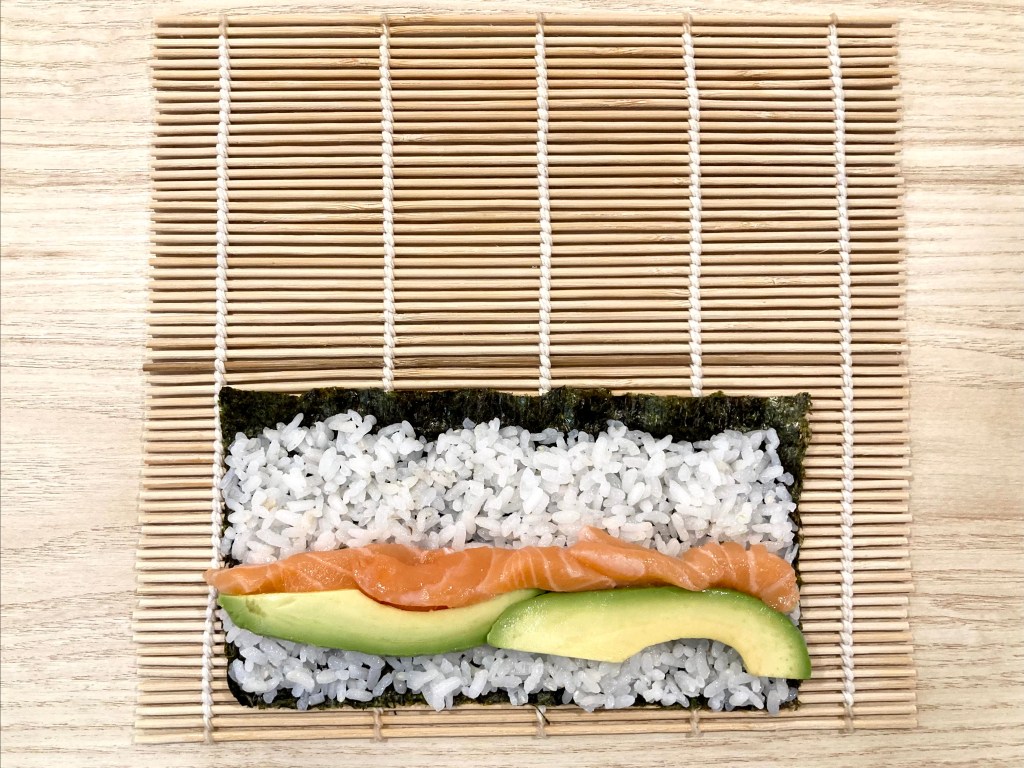
6. Place the filling. Place the filling near the bottom (about 1cm or 1/2 inch above the line).

7. Let’s start rolling! Start rolling from the bottom, holding the filling with the index fingers to prevent it from spilling out.

8. Peel off the mat. When the bottom end lands on the seaweed, start peeling off the mat while you keep rolling so that it will not get rolled into the sushi! Once you finish rolling, squeeze it gently so that it won’t fall apart when you open the mat.

9. Slice into 8 pieces. Slice the roll, first into 1/2, then 1/4, and finally 1/8. Wet the knife and your fingers each time before you touch the sushi. Serve with your choice of soy sauce, wasabi and/or pickled ginger!
My sushi chef friend told me that the key to making perfect-looking sushi rolls is to spread the rice as thinly as possible and also slice the roll in exactly equal heights. He doesn’t need a measure to do this, but his assistants sometimes hide a measure on the side of the chopping board. I still have a long way to go, but no matter how they look, they are always delicious!