
The Japanese name “Onigiri” is usually translated as “Rice Ball” in English as it is not as well-known as Sushi yet. But Onigiris are much more common than sushi in our daily life in Japan, and this is what we take to school or work for lunch or to a picnic. If you have been to Japan, you must surely have seen these rice balls sold in convenience stores for as little as $1. Onigiri is a triangular- or round-shaped salted rice ball, wrapped with seaweed, with fillings inside. The fillings can be fish, meat, veggies, or anything you like. Here, I will show you one with tuna & mayonnaise, which is very popular and can be made with what you most likely already have in your kitchen.
Cooking time: 15 mins + Rice Cooking time
INGREDIENTS (1 serving)

- Seaweed: ½ sheet
- Salt: 2g (⅓ tsp)
- Cooked rice: 200g (see “How to Cook Rice“)
- Canned tuna: ½ can, drained
- Mayonnaise: 15g (1 tbsp)
This yields 2 big onigiris (= 1 serving). Feel free to increase or decrease the amount of rice or tuna proportionally to your needs.
BEFORE YOU START

Let’s cut a sheet of seaweed1 (“Nori“) into eight pieces. Here we will use two pieces of seaweed per onigiri. So if you are making only two onigiris, you will need four pieces, or half a sheet of seaweed. Unless your seaweed is super crisp and can be snapped by hand, it’s easier to use clean scissors.
NOW, LET’S START!

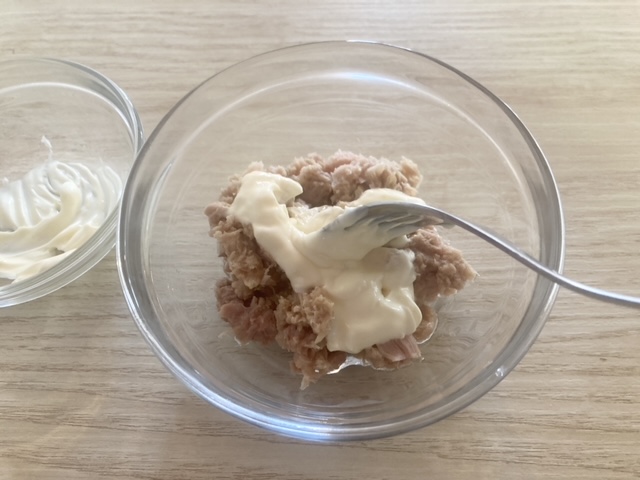
2. Mix tuna with mayonnaise. Make sure that the tuna4 is well-drained before adding mayonnaise5, otherwise your onigiris will be soggy and difficult to mold.
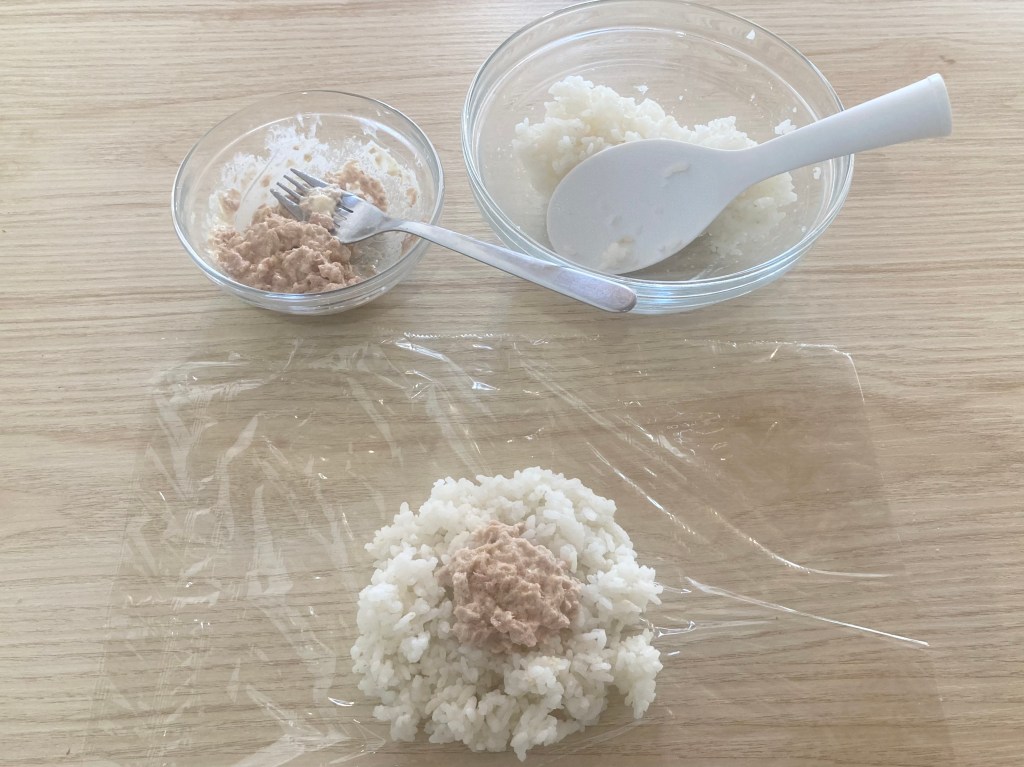
3. Put tuna on the rice. Then place half the rice (or approx. 100g) on a plastic wrap, make a depression with your thumb in the center and put half of the tuna/mayo mix. If you don’t have a plastic wrap, you can place directly on your wet palm. If the rice is still hot, be careful not to burn your hand.

4. Now let’s mold! The most traditional shape is triangle but you can mold it into any shape or size you want. If you are not handy and can’t make it look pretty, don’t worry, it won’t affect the taste.

5. Open the plastic wrap. If you molded with the plastic wrap on, a triangular shaped onigiri should look like this. If you are happy with the shape, open the plastic wrap.
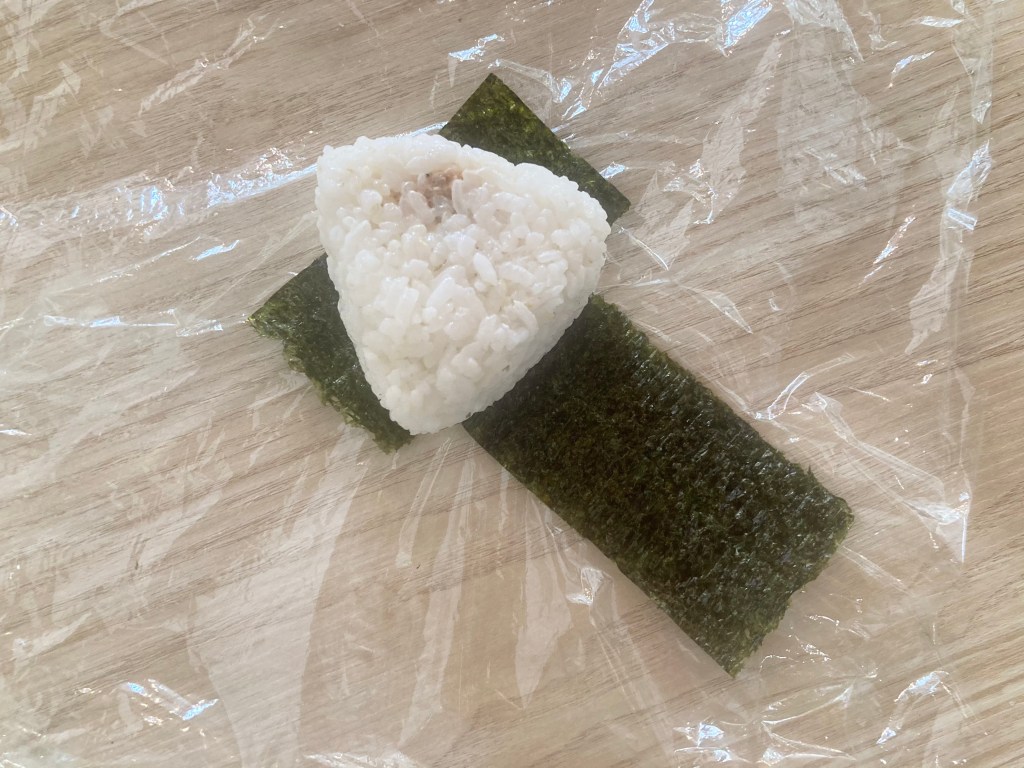
6. Wrap the rice ball with the seaweed. For triangular-shaped onigiris, put one sheet of seaweed on one side horizontally, and another sheet on the other side vertically from the bottom. There is no standard rule here, you can wrap it any way you want. Some people prefer to skip this step for now, and keep the seaweed aside and wrap it right before eating so that the seaweed will remain crisp.

7. Voilà, your first onigiri is done! Put it back in the plastic wrap if you are saving it for later (so that the rice won’t dry out). I usually recycle the same plastic wrap for molding the rest of the onigiris, and use new, smaller sheets for wrapping the finished products.
I like to take onigiris to hiking. My mom says nothing beats eating onigiris after a hike in the mountains. Here I showed you the tuna-mayo filling, but as I said before, you can use whatever fillings you like. The pickled plum or “Umeboshi” shown on the side below is one of the most traditional fillings. It has a very tart, refreshing flavor and has many health benefits. It may be difficult to find outside of Japan, but if you are curious, check your local Japanese grocery store or macrobiotic store if you have one nearby.
